Nginx is one of the most popular web server widely used by many popular websites like facebook, intel, cloudflare, hulu, netflix, dropbox, and more. Unlike Apache web server, nginx is a very light weight web server and proxy server yet comes with the same or even better features. Nginx does not create new process for each http request like Apache does. The more processes are created on a web server, the more Apache takes up memory on the server, and as the result Apache can cause the server to swap memory to disk (degrading performance). Nginx will limit the worker processes, each Nginx’s process is single threaded, and each worker can handle thousands of concurrent connections.
![]() Newer Centos version has been released (Centos 7), and the current stable PHP version is 5.6.x. If you like me, always want everything is up to date, why not use all the new/current technology for our web server. In this article I will show you how to install LEMP server with Nginx 1.6.2, PHP 5.6 and mariadb
Newer Centos version has been released (Centos 7), and the current stable PHP version is 5.6.x. If you like me, always want everything is up to date, why not use all the new/current technology for our web server. In this article I will show you how to install LEMP server with Nginx 1.6.2, PHP 5.6 and mariadb
Installing EPEL and REMI Repository for Centos 7 64 bit
You can always can install nginx via official nginx repo, but you can also install nginx via EPEL repo which I’m going to install nginx and other packages via EPEL.
# rpm -Uvh http://rpms.famillecollet.com/enterprise/remi-release-6.rpm
Install Nginx
You have installed EPEL repo, you can now install nginx package via EPEL
# yum install nginx -y
To start Nginx on Centos 7
# systemctl start nginx
To start Nginx on Centos 7 automatically at boot
# systemctl enable nginx
Enable firewall rules
Centos 7 comes with firewalld as default firewall system instead of iptables. You can always go back to use iptables on Centos 7 but for this article purpose, we will just stick with the default firewalld on Centos 7. To allow http and https traffic in/out your web server, you can use firewall-cmd commands below. (If you don’t use https, you can skip the https line)
# firewall-cmd --permanent --zone=public --add-service=https

To view the nginx default page above, you can either use your public IP address, or your domain which you already have pointed to your public IP address. It’s a little bit different to view IP address on Centos 7 than Centos 6. ifconfig which we always use is not installed on Centos 7 by default.
To view your server ip addresses
# ip addr
If you want the old school ifconfig command back, you can install the net-tools package
# yum install net-tools
Install MariaDB 5.5
Why MariaDB and not MySQL? Simply MariaDB is faster, there are a lot of speed improvement in MariaDB like Innodb asynchronous IO, Indexes for Memory engine, segmentd key cahce for MyISAM, faster CHECKSUM TABLE… MariaDB comes with more extensions like Microseconds, table elimination, pluggable Authentication, GIS functionality, many more new features and less bug. The most thing I like about MariaDB is truly open source, all MariaDB’s code is released under GPL, LGPL or BSD
To install MariaDB on CentOS 7
# yum --enablerepo=remi,remi-php56 install mariadb-server mariadb -y
To start MariaDB on Centos 7
# systemctl start mariadb
To start MariaDB on Centos 7 automatically at boot
# systemctl enable mariadb
secure mariadb
After you have mariadb installed, the next important step is to secure the database server. Similar to MySQL, Mariadb comes with a script to harden your Mariadb databse server. You should always run the script before using the databases.
# /usr/bin/mysql_secure_installation
You will have to answer some question, all you have to do is to say Y to most of them.
/usr/bin/mysql_secure_installation: line 379: find_mysql_client: command not found

NOTE: RUNNING ALL PARTS OF THIS SCRIPT IS RECOMMENDED FOR ALL MariaDB
      SERVERS IN PRODUCTION USE!  PLEASE READ EACH STEP CAREFULLY!

In order to log into MariaDB to secure it, we'll need the current
password for the root user.  If you've just installed MariaDB, and
you haven't set the root password yet, the password will be blank,
so you should just press enter here.

Enter current password for root (enter for none):
OK, successfully used password, moving on...

Setting the root password ensures that nobody can log into the MariaDB
root user without the proper authorisation.

Set root password? [Y/n] y
New password:
Re-enter new password:
Password updated successfully!
Reloading privilege tables..
 ... Success!


By default, a MariaDB installation has an anonymous user, allowing anyone
to log into MariaDB without having to have a user account created for
them.  This is intended only for testing, and to make the installation
go a bit smoother.  You should remove them before moving into a
production environment.

Remove anonymous users? [Y/n] y
 ... Success!

Normally, root should only be allowed to connect from 'localhost'.  This
ensures that someone cannot guess at the root password from the network.

Disallow root login remotely? [Y/n] y
 ... Success!

By default, MariaDB comes with a database named 'test' that anyone can
access.  This is also intended only for testing, and should be removed
before moving into a production environment.

Remove test database and access to it? [Y/n] y
 - Dropping test database...
 ... Success!
 - Removing privileges on test database...
 ... Success!

Reloading the privilege tables will ensure that all changes made so far
will take effect immediately.

Reload privilege tables now? [Y/n] y
 ... Success!

Cleaning up...

All done!  If you've completed all of the above steps, your MariaDB
installation should now be secure.

Thanks for using MariaDB!
Install PHP-fpm 5.6
I’m going to use remi repo for php-fpm and other php* modules. Make sure you use the correct –enablerepo option with yum command. These are common php modules for today php scripts, you can add/remove modules to your needs.
# yum --enablerepo=remi,remi-php56 install php-fpm php-common php-mysql php-opcache php-pear php-gd php-devel php-mbstring php-mcrypt php-cli php-pdo php-xml -y
To search for more available PHP modules, you can use this command to list more PHP modules
# yum search php
To get more detail about each php module does, you can of course google the package name, or use “yum info” command to look at the long description of the package.
# yum info package_name
To start PHP-FPM on Centos 7
# service php-fpm start
To start PHP-FPM on Centos 7 automatically at boot
# chkconfig php-fpm on
Configure Nginx
By now you should have nginx, mariadb, and php-fpm installed on your LEMP web server. Now let’s configure nginx to make everything work well together.
Nginx Global Configuration
Default nginx global configuration file is located at /etc/nginx/nginx.conf You can nginx user, worker_processes, server name, listening port and other things in this file.
To edit nginx global configuration file
# nano /etc/nginx/nginx.conf
There are few important things you should look at.
user  nginx;

worker_processes  1;
user: If you are the only one who use the web server, you should keep the default nginx user which is nginx.
worker_processes: this value should be equal of the number of cpu or vcpu you have on the server.
To check the number of cpu/vcpu of the server
# grep ^processor /proc/cpuinfo | wc -l
Then set nginx_processes accordingly
Next enable sendfile, tcp_nopush, gzip, and add index.php
    sendfile        on;
    #tcp_nopush     on;

    #keepalive_timeout  0;
    keepalive_timeout  65;

    #gzip  on;

    index   index.html index.htm;
    sendfile        on;
    tcp_nopush     on;

    #keepalive_timeout  0;
    keepalive_timeout  65;

    gzip  on;

    index   index.php index.html index.htm;
    server {
        listen       80 default_server;
        server_name  localhost;
        root         /usr/share/nginx/html;
default_server: is usually your domain name
80: is the port nginx listen to, almost all webserver listen to port 80, if you want to change your nginx listen port, you can change it here.
root: is the default server root directory, all of your website pages, files, images, javascripts and such will go here.
Create New Nginx Server Block Files
All nginx server block files should be located in /etc/nginx/conf.d/ with .conf file extension. Says we are going to create a server block file for namhuy.net website (replace namhuy.net with your domain names).
# nano /etc/nginx/conf.d/namhuy_net.conf
With the content (adjust the values to your own configuration), this is just an example server block file
server {
    listen your_public_ip_address:80;
    server_name  www.namhuy.net;
    root /var/www/www.namhuy.net;
    index index.php index.html index.htm;

    charset utf-8;

        location / {
        }

        location = /robots.txt { allow all; access_log off; log_not_found off; }
        location = /favicon.ico { allow all; access_log off; log_not_found off; }

    error_page 401 /401.html;
    error_page 403 /403.html;
    error_page 404 /404.html;
    error_page 500 502 503 504 /50x.html;

    location ~ \.php$ {
        root           /var/www/www.namhuy.net;
        fastcgi_pass   127.0.0.1:9000;
        fastcgi_index  index.php;
        fastcgi_param  SCRIPT_FILENAME  $document_root$fastcgi_script_name;
        fastcgi_intercept_errors on;
        fastcgi_buffer_size 4K;
        fastcgi_buffers 128 4k;
        fastcgi_connect_timeout 50;
        fastcgi_send_timeout 40;
        fastcgi_read_timeout 40;
        try_files $uri =404;
        fastcgi_split_path_info ^(.+\.php)(/.+)$;
        include        fastcgi_params;
    }

    # deny access to .htaccess files, if Apache's document root
    # concurs with nginx's one
    #
    # location ~ /\.ht {
    #     deny  all;
    # }
}
# mkdir /var/www/www.namhuy.net
# chmod 777 /var/www/www.namhuy.net
# systemctl restart nginx
For whatever reason nginx won’t restart, you can use these commands to see what’s wrong with your current nginx configuration
# systemctl status nginx.service
# nginx -t
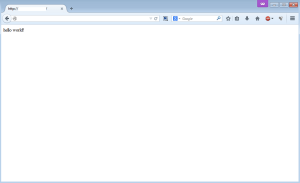
# nano /var/www/www.namhuy.net/index.html
with the content
<html>
<body>
<p>hello world!</p>
</body>
</html>
# nano /var/www/www.namhuy.net/info.php
<?php
phpinfo();
?>