How to install VNC Server on Debian 7
Even thought most people will think Ubuntu is the most popular Linux distribution, but did you know Ubuntu is based on Debian! Interesting fact isn’t it. Well I’m going to show you How to install VNC Server on Debian 7 wheezy today. If you are not using Debian but Ubuntu, I have also written How to install VNC Server on Ubuntu 14.04.
Update and Upgrade Debian 7 Wheezy
Before we start to install or configure anything, we should always update our Debian 7 Wheezy system is up to date
$ su -

<h1>apt-get update; apt-get dist-upgrade -y --force-yes</h1>
Install GUI on Debian 7 Wheezy
There are several GUIs available for you to choose. Gnome, KDE, Xfce, LXDE … Take your pick, I have written a tutorial how to Install GUI on debian 7 wheezy which includes most of the popular GUIs available for Debian. Unlike Ubuntu 14.04, gnome seems to works fine over VNC, I have tested gnome session and it works with VNC. It’s not I don’t like gnome, but I would prefer xfce over gnome since xfce is very light weight and it has what I need for.
To install xfce on Debian 7 Wheezy
# apt-get install xorg xfce4 xfce4-goodies thunar-archive-plugin synaptic gdebi wicd iceweasel
Install VNC Server on Debian 7 Wheezy
Very similar to Ubuntu (since Ubuntu is based on Debian), you only need to use vnc4server package to install VNC Server
# apt-get install vnc4server
Configure VNC Server to work on Ubuntu 14.04
You can use any privileged user or root user to login to your VNC Server, but for security reason, I’m going to create vncuser for my VNC Server (you can change vncuser in my tutorial to any user that you would like to use, it can be your existing user)
# adduser vncuser
Now set vncuser’s password
# passwd vncuser
We now switch to vncuser to create some VNC configuration’s files.
# su - vncuser
With regular or privileged user, start vncserver for vncserver to creates it’s necessary files.
$ vncserver
After you started VNC Server, you will be asked to create VNC’s password (VNC password can be different or the same password as your user’s password)
vncuser@namhuy:~$ vncserver
You will require a password to access your desktops.
Password:
Verify:
xauth:  file /home/vncuser/.Xauthority does not exist

New 'namhuy:1 (vncuser)' desktop is namhuy:1

Creating default startup script /home/vncuser/.vnc/xstartup
Starting applications specified in /home/vncuser/.vnc/xstartup
Log file is /home/vncuser/.vnc/namhuy:1.log
$ vncserver -kill :1
$ cd ~
$ > .vnc/xstartup
$ nano .vnc/xstartup
#!/bin/sh
unset SESSION_MANAGER
unset DBUS_SESSION_BUS_ADDRESS
startxfce4 &

[ -x /etc/vnc/xstartup ] && exec /etc/vnc/xstartup
[ -r $HOME/.Xresources ] && xrdb $HOME/.Xresources
xsetroot -solid grey
vncconfig -iconic &
Gnome-Desktop Environment
gnome-session &
startkde &
mate-session &
startlxde &
cinnamon &
openbox &
$ su -
# nano /etc/init.d/vncserver
#!/bin/bash
### BEGIN INIT INFO
# Provides:          tightvncserver
# Required-Start:    $syslog
# Required-Stop:     $syslog
# Default-Start:     2 3 4 5
# Default-Stop:      0 1 6
# Short-Description: vnc server
# Description: http://www.namhuy.net
#
### END INIT INFO

unset VNCSERVERARGS
VNCSERVERS=""
[ -f /etc/vncserver/vncservers.conf ] && . /etc/vncserver/vncservers.conf
prog=$"VNC server"
start() {
. /lib/lsb/init-functions
REQ_USER=$2
echo -n $"Starting $prog: "
ulimit -S -c 0 >/dev/null 2>&1
RETVAL=0
for display in ${VNCSERVERS}
do
export USER="${display##*:}"
if test -z "${REQ_USER}" -o "${REQ_USER}" == ${USER} ; then
echo -n "${display} "
unset BASH_ENV ENV
DISP="${display%%:*}"
export VNCUSERARGS="${VNCSERVERARGS[${DISP}]}"
su ${USER} -c "cd ~${USER} && [ -f .vnc/passwd ] && vncserver :${DISP} ${VNCUSERARGS}"
fi
done
}
stop() {
. /lib/lsb/init-functions
REQ_USER=$2
echo -n $"Shutting down VNCServer: "
for display in ${VNCSERVERS}
do
export USER="${display##*:}"
if test -z "${REQ_USER}" -o "${REQ_USER}" == ${USER} ; then
echo -n "${display} "
unset BASH_ENV ENV
export USER="${display##*:}"
su ${USER} -c "vncserver -kill :${display%%:*}" >/dev/null 2>&1
fi
done
echo -e "\n"
echo "VNCServer Stopped"
}
case "$1" in
start)
start $@
;;
stop)
stop $@
;;
restart|reload)
stop $@
sleep 3
start $@
;;
condrestart)
if [ -f /var/lock/subsys/vncserver ]; then
stop $@
sleep 3
start $@
fi
;;
status)
status Xvnc
;;
*)
echo $"Usage: $0 {start|stop|restart|condrestart|status}"
exit 1
esac
# chmod +x /etc/init.d/vncserver
# mkdir -p /etc/vncserver

<h1>nano /etc/vncserver/vncservers.conf</h1>
VNCSERVERS="1:vncuser"
VNCSERVERARGS[1]="-geometry 1024x768"
The first line VNCSERVERS is to set the user to access VNC server with the VNC port. Number 1 means port 1 or 5901. The VNC port will increase to 2 or 5902 or so if you keep adding user to access your VNC Server.
The second line VNCSERVERARGS is to set screen size for the VNC session. You can change the VNC screen size here to fit your screen.
The last step is to make VNC Server starts on boot
# update-rc.d vncserver defaults 99
You will see missing LSB information warning, just ignore it. Reboot your Debian 7 system and test out your new VNC Server on Debian 7 Wheezy
# reboot
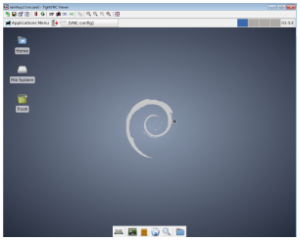
You can login to your remote server via VNC with domain or IP. The VNC port is the port you configured in /etc/vncservers.conf for the specific user.
If you can’t access your VNC Server, make sure you allow VNC ports in iptables
# iptables -L

 <h1>iptables -A INPUT -m state --state NEW -m tcp -p tcp -m multiport --dports 5901:5903,6001:6003 -j ACCEPT</h1>

 <h1>iptables-save</h1>