Lab 4-2: Implementing OSPF for IPv6
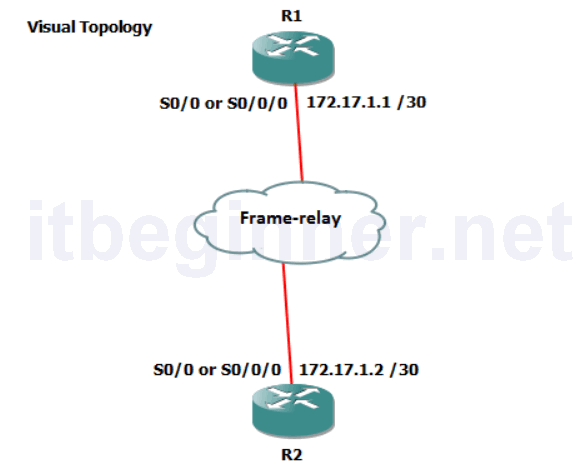
Physical Topology Diagram
- Visual Topology
- Command Line
- Task 1: Enabling OSPFv3
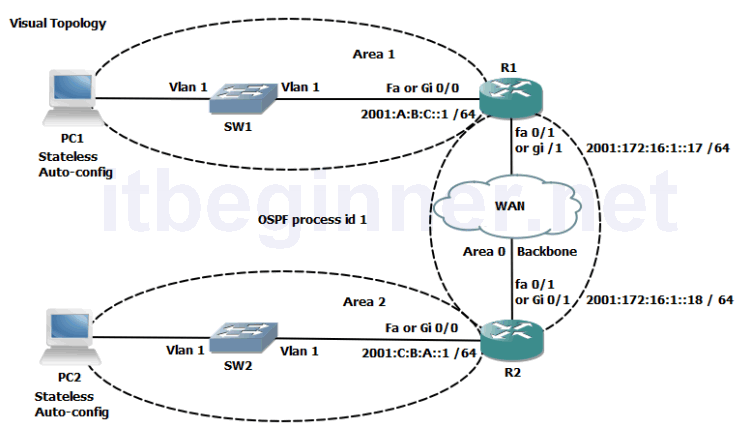
Visual Topology
Command Line
| Command | Description |
|---|---|
| ipv6 ospf process id area id | Enables OSPFv3 on an interface |
| ipv6 router ospf process id | Enters the OSPFv3 configuration mode |
| router-id id | Set a 32 bit router-id (dotted decimal notation) |
| Show ipv6 ospf interface brief | Displays interfaces that are enabled for OSPFv3 |
| show ipv6 ospf neighbor | Displays the contents of the OSPFv3 neighbours table |
| show ipv6 route ospf | Displays any OSPFv3 entries contained in the IPv6 routing table (best paths) |
Task 1: Enabling OSPFv3 for IPv6.
Step 1: Access the CLI on your router
Step 2: Confirm you still have your IPv6 addresses configured.
R#sh ipv6 int brief
| Router | Interface | IPv6 address and mask |
|---|---|---|
| R1 | fa0/0 or gi0/0 | 2001:A:B:C::1/64 |
| R1 | fa0/1 or gi0/1 | 2001:172:16:1::17/64 |
| R2 | fa0/0 or gi0/0 | 2001:C:B:A::1/64 |
| R2 | fa0/1 or gi0/1 | 2001:172:16:1::18/64 |
Step 3: Your router will once again be configure to act as an ABR, use the table below to identify the area ID and also the Router ID to be used.
| Router | Router-ID | Interface | Area |
|---|---|---|---|
| R1 | 1.1.1.1 | fa0/0 or gi0/0 | 1 |
| R1 | fa0/1 or gi0/1 | 0 | |
| R2 | 2.2.2.2 | fa0/0 or gi0/0 | 2 |
| R2 | fa0/1 or gi0/1 | 0 |
Enter into the OSPFv3 router configuration mode using a process-id of 1.
Step 4: While in the router configuration mode configure the unique router-ID listed in the table above.
Step 5: Navigate to the interface configuration mode and enable OSPFv3 for process 1.
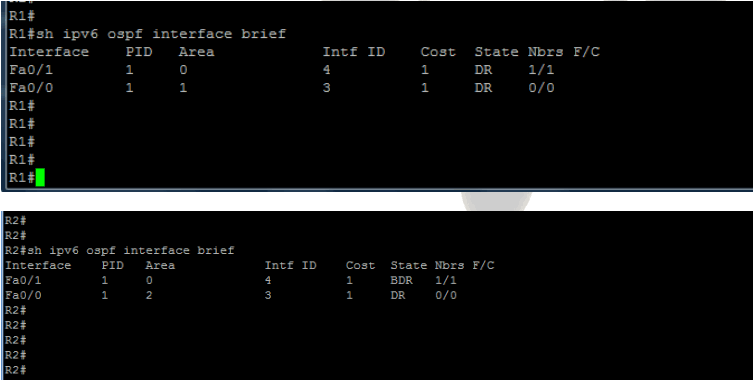
Step 6: Use the sh ipv6 ospf int brief command to verify your configuration.
Step 7: Analyze the contents of the adjacency table using the sh ipv6 ospf nei command.
The output looks very similar to OSPFv2 running on IPv4.
Step 8: Use the appropriate command to display all active IPv6 routing protocols.
Based on the output displayed, does OSPFv3 have the same administrative distance as OSPFv2?
Step 9: Save your running-config.
Lab Answer Keys:
[sociallocker id=”4139″]Task 1: Enabling OSPFv3 for IPv6.
Step 1: Access the CLI on your router
Step 2: Confirm you still have your IPv6 addresses configured.
R#sh ipv6 int brief
| Router | Interface | IPv6 address and mask |
|---|---|---|
| R1 | fa0/0 or gi0/0 | 2001:A:B:C::1/64 |
| R1 | fa0/1 or gi0/1 | 2001:172:16:1::17/64 |
| R2 | fa0/0 or gi0/0 | 2001:C:B:A::1/64 |
| R2 | fa0/1 or gi0/1 | 2001:172:16:1::18/64 |
Step 3: Your router will once again be configure to act as an ABR, use the table below to identify the area ID and also the Router ID to be used.
| Router | Router-ID | Interface | Area |
|---|---|---|---|
| R1 | 1.1.1.1 | fa0/0 or gi0/0 | 1 |
| R1 | fa0/1 or gi0/1 | 0 | |
| R2 | 2.2.2.2 | fa0/0 or gi0/0 | 2 |
| R2 | fa0/1 or gi0/1 | 0 |
Enter into the OSPFv3 router configuration mode using a process-id of 1.
R(config)#ipv6 router ospf 1
Step 4: While in the router configuration mode configure the unique router-ID listed in the table above.
R1 only....
R1(config-router)#router-id 1.1.1.1
R2 only.....
R2(config-router)#router-id 2.2.2.2
Step 5: Navigate to the interface configuration mode and enable OSPFv3 for process 1.
R1 only.....
R1(config)#int fa0/0
or
R1(config)#int gi0/0
R1(config-if)#ipv6 ospf 1 area 1
R1(config-if)#int fa0/1
or
R1(config-if)#int gi0/1
R1(config-if)#ipv6 ospf 1 area 0
R2 only.....
R2(config)#int fa0/0
or
R2(config)#int gi0/0
R2(config-if)#ipv6 ospf 1 area 2
R2(config-if)#int fa0/1
or
R2(config-if)#int gi0/1
R2(config-if)#ipv6 ospf 1 area 0
Step 8: Use the appropriate command to display all active IPv6 routing protocols.
R#sh ipv6 protocols
Based on the output displayed, does OSPFv3 have the same administrative distance as OSPFv2?
Yes, both use a default administrative distance of 110
Step 9: Save your running-config.
R#copy run start[/sociallocker]