OpenVPN is an open source software which let you tunnel any IP subnetwork or virtual ethernet adapter over a single UDP or TCP port. Similar to Microsoft’s VPN protocol, OpenVPN also supports L2TP/IPsec and SSTP (many VPN businesses still using old flawed PPTP protocol).
OpenVPN comes with two versions Access Server and community version. There are few differences between OpenVPN Access Server and OpenVPN community version. OpenVPN Access Server is a commercial version with a nice web interface control panel, but OpenVPN-AS only comes with 2 free concurrent users at a time. If you want to have more connection to your OpenVPN-AS, you will need to pay more. Mean while, OpenVPN community version is totally free but you will need to install and configure everything manually without a nice web interface control panel plus OpenVPN client software. There are no functionality difference between the Access Server vs community version. When you have OpenVPN community version installed and configured correctly you can have unlimited connection to your OpenVPN server but there are lots of configurations going on with the community version.
![]()
If you just want a simple VPN server for personal/private usage, OpenVPN-AS might be your best choice since it’s very simple to install and configure yet it comes with a nice & easy to use web interface control panel. So I’m going to show you how to install OpenVPN Access Server or OpenVPN-AS on CentOS 6 in this article.
Update CentOS 6 server
To get your CentOS 6 server ready to install OpenVPN-AS, update your CentOS 6 system first. Keep your system up to date is always a good idea to keep your server secured and updated with new features.
# yum -y update
Download OpenVPN Access Server
OpenVPN-AS is a cross-platform supports RedHat, Fedora, CentOS, Ubuntu, Debian, OpenSUSE, but for this article I’m using CentOS 6. We are going to download OpenVPN-AS package for CentOS 6
OpenVPN-AS for CentOS 6 32bit
# cd /etc/
# wget http://swupdate.openvpn.org/as/openvpn-as-2.0.10-CentOS6.i386.rpm
OpenVPN-AS for CentOS 6 64bit
# cd /etc/
# wget http://swupdate.openvpn.org/as/openvpn-as-2.0.10-CentOS6.x86_64.rpm
The newest version of OpenVPN-AS at the time I’m writing this article is 2.0.10. In case you get 404 file not found error, you can go to https://openvpn.net/index.php/access-server/download-openvpn-as-sw.html to download the latest OpenVPN-AS package.
Install OpenVPN Access Server
You should have everything ready to install OpenVPN-AS by now, let’s install OpenVPN-AS on your CentOS 6 server
# rpm -i /etc/openvpn-as*
After running rpm command to install OpenVPN-AS, you should see similar output to mine
The Access Server has been successfully installed in /usr/local/openvpn_as
Configuration log file has been written to /usr/local/openvpn_as/init.log
Please enter "passwd openvpn" to set the initial
administrative password, then login as "openvpn" to continue
configuration here: https://youripaddress:943/admin
To reconfigure manually, use the /usr/local/openvpn_as/bin/ovpn-init tool.

Access Server web UIs are available here:
Admin UI: https://youripaddress:943/admin
Client UI: https://youripaddress:943/
As you can see on your terminal, you will have to set password for openvpn user which openvpn-as package created for you. The user “openvpn” is the administrator user for OpenVPN Admin UI and to control the web interface control panel.
# passwd openvpn
To mange your OpenVPN-AS server, open your web browser, then go to
https://youripaddress:943/admin
or
https://yourhostname:943/admin
At first you should see untrusted connection warning, you can ignore the warning since OpenVPN-AS uses self-signed ssl certificate. You can always buy a signed ssl certificate for your OpenVPN-AS but I think it’s unnecessary because we are going to use this OpenVPN-AS for personal/private usage and we will not use the Admin Web UI that often after everything is configured correctly.
In my case I use Firefox, your web browser may give you different warning, but basically it’s the same thing but you may have to do different step to skip this warning.
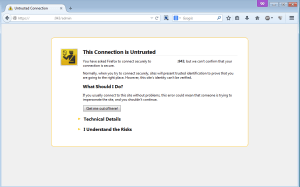
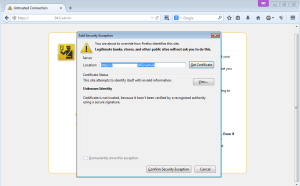
To skip this page, click on “I understand the Risks”, and click on “Add Exception..”. The new window should pop up for you to add security exception. You can choose an option “Permanently store this exception” so the next time you go to OpenVPN-AS Admin Web UI, your web browser won’t give you the warning again. Finally click on “Confirm Security Exception”
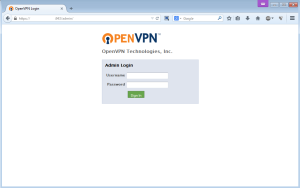
After went through all of the warning, you will see the login page. You can login to this page with openvpn user with the password you set before.
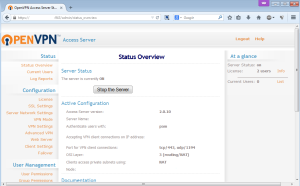
This is the basic view of OpenVPN-AS Admin Web UI
Add user to OpenVPN-AS server
As I mentioned before, OpenVPN-AS comes with 2 concurrent users license. OpenVPN-AS created the first user for you as openvpn. To add another user to access OpenVPN-AS, you can use an existence linux user to OpenVPN-AS. If you are the sole user of your system and want to have another user to access OpenVPN-AS, you have to create a new Linux user on your system.
To add a new user to login to your OpenVPN server (replace newuser to whatever you like), type this command on the terminal
# adduser newuser
To set password for the new user (replace newuser to your user)
# passwd newuser
Now back to OpenVPN-AS Admin Web UI, under “User Management”, click on “User Permissions”. Type in the new username you created in the terminal, then click “Save Settings”. By now you should see OpenVPN-AS has added the new user, you will need to click on “Update Running Server” for the change to take effect.
How to use OpenVPN
To use OpenVPN, you can go to
https://youripaddress:943/
or
https://yourhostname:943/
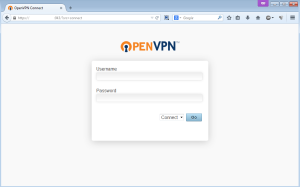
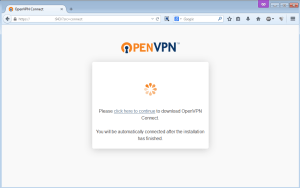
You will see a login page, you can login with either openvpn or the new user you created. After you logged in, OpenVPN page will redirect you to the new page to download OpenVPN client software for your OS. OpenVPN client supports Windows, Mac OS X, iOS, Android, and Linux!