How to setup a LAMP server Linux, Apache, MySQL, PHP on Debian 7 wheezy Linux
LAMP stands for Linux, Apache, MySQL, and PHP (P can be replaced with Perl Or Python). I’m going to show you how to install a standard full-featured LAMP server on Debian 7 Wheezy system. Apache is the most popular web server in the world which more than 50% of web servers in the world are running it. I will use a fresh installed Debian 7 Wheezy Linux server for this article.
Update your Debian 7 system
Before installing anything to your system, make sure your Debian 7 system is update to date.
# apt-get && apt-get upgrade -y
Install and Configure the Apache Web Server
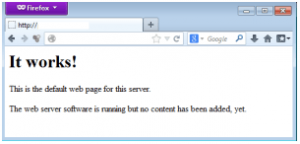
We are going to start with Apache the web server first. Apache is the most powerful and well supported web server for most uses from static html pages or dynamic PHP server side scripting.
# apt-get install apache2 apache2-doc
output
Reading package lists... Done
Building dependency tree
Reading state information... Done
The following extra packages will be installed:
  apache2-mpm-worker apache2-utils apache2.2-bin apache2.2-common libapr1
  libaprutil1 libaprutil1-dbd-sqlite3 libaprutil1-ldap ssl-cert
Suggested packages:
  apache2-suexec apache2-suexec-custom openssl-blacklist
The following NEW packages will be installed:
  apache2 apache2-doc apache2-mpm-worker apache2-utils apache2.2-bin
  apache2.2-common libapr1 libaprutil1 libaprutil1-dbd-sqlite3
  libaprutil1-ldap ssl-cert
0 upgraded, 11 newly installed, 0 to remove and 0 not upgraded.
Need to get 3,260 kB of archives.
After this operation, 18.4 MB of additional disk space will be used.
Do you want to continue [Y/n]?
[ ok ] Starting web server: apache2.
Setting up apache2 (2.2.22-13+deb7u1) ...
Setting up apache2-doc (2.2.22-13+deb7u1) ...
[ ok ] Reloading web server config: apache2.
Setting up ssl-cert (1.0.32) ...
Most modern open source PHP scripts often use mod_rewrite and .htaccess file like WordPress Pretty Permalinks, Drupal clean URLs, or phpBB SEO URL.
# a2enmod rewrite
Enabling module rewrite.
To activate the new configuration, you need to run:
  service apache2 restart
# service apache2 restart
Creating user and setting up Virtual Hosts
If you host multiple websites or have multiple users, you will have to setup separate Virtual Hosts or each user or website.
To add new user on Debian Linux (replace yourusername to whatever you like)
# adduser yourusername
To set password for new user (you will be asked to type in your password twice)
# passwd yourusername
Now create a directory to store your website files, lets call that directory public_html, and logs directory to store logs files
# cd /home/yourusername# mkdir public_html# mkdir logs
The next step is to setup directories permission and owner to your public_html directory
# chown yourusername:www-data /home/yourusername/public_html# chown yourusername:www-data /home/yourusername/logs# chmod 755 /home/yourusername
Configure Name-based Virtual Hosts
If you host multiple websites or have multiple users, you will have to setup separate Virtual Hosts or each user or website. There is no limit how many Virtual Hosts you can create. In debian, Virtual Hosts files will be stored in /etc/apache2/sites-availables/ directory, you can seperate each virtual host files by domain or subdomain or however you want. Each virtual host file should be saved with .conf file extension.
For this article, I will use “fuji” as a linux username. All of my website files will be stored in /home/fuji/public_html directory. Let’s say we are going to setup yourdomain.com and yourdomain.net under fuji username. We are going to create yourdomain.com and yourdomain.net in /etc/apache2/sites-available/ directory.
configure yourdomain.com VirtualHost
Creating yourdomain.com.conf file
# nano /etc/apache2/sites-available/yourdomain.com
with the content
<VirtualHost *:80>
ServerAdmin webmaster@yourdomain.com
ServerName yourdomain.com
ServerAlias yourdomain.com
DocumentRoot /home/fuji/public_html/yourdomain.com/
ErrorLog /home/fuji/logs/yourdomain.com.error.log
CustomLog /home/fuji/logs/yourdomain.com.access.log combined
<Directory /home/fuji/public_html/yourdomain.com/>
Options Indexes FollowSymLinks MultiViews
AllowOverride All
Order allow,deny
allow from all
</Directory>
</VirtualHost>
# nano /etc/apache2/sites-available/yourdomain.net
<VirtualHost *:80>
ServerAdmin webmaster@yourdomain.net
ServerName yourdomain.net
ServerAlias yourdomain.net
DocumentRoot /home/fuji/public_html/yourdomain.net/
ErrorLog /home/fuji/logs/yourdomain.net.error.log
CustomLog /home/fuji/logs/yourdomain.net.access.log combined
<Directory /home/fuji/public_html/yourdomain.net/>
Options Indexes FollowSymLinks MultiViews
AllowOverride All
Order allow,deny
allow from all
</Directory>
</VirtualHost>
After you have your virtualhost files configured correctly, it’s time to enable them by using a2ensite command. In this article I have yourdomain.com and yourdomain.net virtualhost files. We are going to host two separate domains with the same user, we need to create two separate directories for those two domains.
# mkdir /home/fuji/public_html/yourdomain.com# mkdir /home/fuji/public_html/yourdomain.net
# a2ensite yourdomain.com# a2ensite yourdomain.net
To activate the new configuration, you need to run:
  service apache2 reload
# service apache2 reload
# a2dissite yourdomain.net# service apache2 reload
Starting web server: apache2Action 'start' failed.
The Apache error log may have more information.
# cat /var/log/apache2
Install and Configure MySQL Database Server
MySQL is a very popular databse system which is very fast, reliable and easy to use. Many popular website rely on MySQL like Google, Facebook… Most open source PHP scripts like WordPress, Movable Type, Drupal, Joomla, Mambo use MySQL.
To install MySQL databse server on Debian
# apt-get install mysql-server mysql-client
output
Reading package lists... Done
Building dependency tree
Reading state information... Done
The following extra packages will be installed:
  libaio1 libdbd-mysql-perl libdbi-perl libhtml-template-perl libmysqlclient18
  libnet-daemon-perl libplrpc-perl mysql-client-5.5 mysql-common
  mysql-server-5.5 mysql-server-core-5.5
Suggested packages:
  libipc-sharedcache-perl libterm-readkey-perl tinyca
The following NEW packages will be installed:
  libaio1 libdbd-mysql-perl libdbi-perl libhtml-template-perl libmysqlclient18
  libnet-daemon-perl libplrpc-perl mysql-client mysql-client-5.5 mysql-common
  mysql-server mysql-server-5.5 mysql-server-core-5.5
0 upgraded, 13 newly installed, 0 to remove and 0 not upgraded.
Need to get 9,913 kB of archives.
After this operation, 97.4 MB of additional disk space will be used.
Do you want to continue [Y/n]?
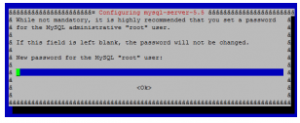
# mysql_secure_installation
Install and Configuring PHP
PHP is a server scripting language, it can handle business logic with conditionals, loops, arrays and object. PHP is great when you are working with a database, you can store all informatioin in a database and use PHP program/scipt to fetch the information details from the datbase to display them in the user browser. You have apache we server installed which can handle html, and MySQL database server, to make PHP works in your web server and mysql, you have to install few PHP packages.
# apt-get install php5 php-pear php5-mysql php5-dev libapache2-mod-php5 php5-dev php5-curl php5-gd php5-imagick php5-mcrypt
To confirm PHP is working, create a test php file in one of your domain
# nano /home/fuji/public_html/yourdomain.com/info.php
with the content
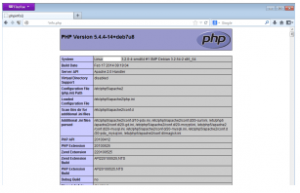
<?php phpinfo(); ?>
Now on your web browser, load the info.php file by going to http://yourdomain.com/info.php if you see the phpinfo web page means your apache/php is working.
Install phpMyAdmin
phpMyAdmin is a free software to manage MySQL databases. Written in PHP, you can create, drop, import, export, optimize tables, repair tables, even run queries with phpMyAdmin.
# apt-get install phpmyadmin
You will be asked to choose the web server that you are running, in our case we use apache2.

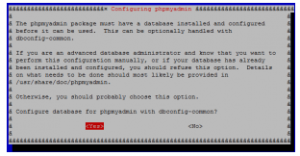
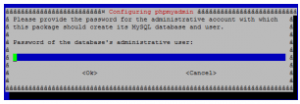
At the next screen, we will be asked if we want to configure databse for phpmyadmin with dbconfig-common. Say yes on this
Type in your MySQL root’s password which you set it up earlier during MySQL server installation process. You will be asked for MySQL root’s password twice
After that you can use phpmyadmin via http://yourdomain.com/phpmyadmin
—————————-
Note:
Instead of using PHP, you can use Perl and/or Python on your Lamp server setup.
To install Perl on Debian 7 wheezy
# apt-get install install perl libapache2-mod-perl2
To install Python on Debian 7 wheezy
# apt-get install python libapache2-mod-python