
Ubuntu 14.04 Trusty LTS had been released not long ago. Ubuntu 14.04 is a LTS (long term support) means it’s very stable which is very good to setup a LAMP server Linux, Apache, MySQL, PHP. LAMP stands for Linux, Apache, MySQL, and PHP (P can be replaced with Perl Or Python). I’m going to show you how to install a standard full-featured LAMP server on Ubuntu 14.04 LTS.
Update/Upgrade Ubuntu 14.04
As always, update/upgrade your Ubuntu system regularly.
# apt-get udpate; apt-get dist-upgrade -y --force-yes
Install and Configure the Apache Web Server
We are going to install Apache web server on Ubuntu 14.04 first. Apache is the most popular web server in the world so you can’t go wrong with Apache. Apache can support both static and dynamic website.
# apt-get install apache2 apache2-bin apache2-data apache2-doc apache2-mpm-prefork apache2-utils
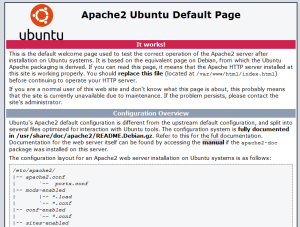
This what Ubuntu Apache2′s default page look like
If you get this error while trying to install Apache
WARNING: The following packages cannot be authenticated!
You can either ignore the warning and install Apache packages without being authenticated, or you can update Ubuntu’s list of keys to authenticate packages
# apt-key update
# apt-get update
Enable mod_rewrite for Apache2
mod_rewrite is not enabled by default, you have to enable module rewrite to use it.
# a2enmod rewrite
and restart apache2 to activate mod_rewrite
# service apache2 restart
Creating user and setting up Virtual Hosts
If you going to host a single website, the default apache2 will store files in /var/www/html/ directory, and you don’t really need to setup Virtual Hosts, but if you are going to host multiple websites it’s hard to control all of them in one directory. I’m going to create a new user for new website directory which make it easier to manage.
To create new user, I’m going to call my new user “malaku”. You can replace malaku to anything you like
# adduser malaku
you will be asked to type in your password twice
Adding user `malaku' ...
Adding new group `malaku' (1000) ...
Adding new user `malaku' (1000) with group `malaku' ...
Creating home directory `/home/malaku' ...
Copying files from `/etc/skel' ...
Enter new UNIX password:
Retype new UNIX password:
passwd: password updated successfully
Changing the user information for malaku
Enter the new value, or press ENTER for the default
 Full Name []:
 Room Number []:
 Work Phone []:
 Home Phone []:
 Other []:
Is the information correct? [Y/n]
We are now going to create a directory named “public_html” to store website’s content, and logs to store apache2′s log
# cd /home/malaku
# mkdir public_html logs
The next step is to setup directories permission and owner to your public_html and logs directories. Don’t forget to replace my username (malaku) to yours.
# chown malaku:www-data /home/malaku/public_html /home/malaku/logs
# chmod 755 /home/yourusername
Configure Name-based Virtual Hosts
Unlike Centos, Ubuntu and Debian keeps each Virtual Host setting separately in /etc/sites-available and /etc/sites-enabled directory. First you will have to add new Virtual Host in /etc/apache2/sites-available directory, each domain or subdomain should have separate virtual host file, and virtual host file should end with .conf file extension.
By default Ubuntu 14.04 will come with 000-default.conf for http and default-ssl.conf for https. For regular use, we are going to modify and use 000-default.conf in /etc/sites-available directory.
You gotta disable 000-default.conf configuration before use it.
# a2dissite 000-default.conf
# service apache2 reload
Change 000-default.conf file name to your domain name (replace domain.com to your domain name)
# mv 000-default.conf domain.com.conf
Empty the content of domain.com.conf and file
# > domain.com.conf
And add these configurations to domain.com.conf file
# nano domain.com.conf
<VirtualHost *:80>

ServerName domain.com
ServerAlias domain.com
ServerAdmin [email protected]
DocumentRoot /var/www/html

ErrorLog ${APACHE_LOG_DIR}/error.log
CustomLog ${APACHE_LOG_DIR}/access.log combined

<Directory /var/www/html>
Options Indexes ExecCGI Includes FollowSymLinks MultiViews
AllowOverride All
Order Deny,Allow
Allow from all
</Directory>

</VirtualHost>
Save domain.com.conf file, we are now ready to enable the virtualhosts for your domain
# a2ensite domain.com.conf
Your domain.com.conf DocumentRoot /var/www/html means you should store your website files in /var/www/html
For any reason your Apache won’t start or having error, you can read apache2 error log in /var/log/apache2
# cat /var/log/apache2/error.log
Install and Configure MySQL Database Server
Most modern websites/scripts like WordPress, PHPbb, Drupal and such use some sort of database, most of them support MySQL so I’m going to use MySQL on Ubuntu 14.04 with Apache2 web server.
To install MySQL databse server on Ubuntu 14.04
# apt-get install mysql-server mysql-client
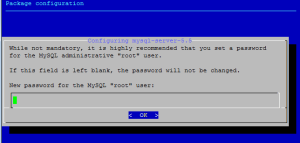
You will be asked to set root password for MySQL database
Install and Configuring PHP
Similar to MySQL, WordPress and other open source CMS will require PHP in order to run. To install PHP on Ubuntu 14.04
# apt-get install php5 php-pear php5-mysql php5-dev libapache2-mod-php5 php5-dev php5-curl php5-gd php5-imagick php5-mcrypt
To test PHP if it work on your Apache2 web server, we are going to create a php info page
# nano /var/www/html/info.php
with the content
<?php phpinfo(); ?>
In your web browser, go to your domain.con/info.php , if you see a page similar to this means php is working

Install PHPMyAdmin in Ubuntu 14.04
phpMyAdmin will help you to manage MySQL database easier rather than in the command lines. You can do pretty much everything with phpMyAdmin like create, drop, import, export, optimize tables, repair tables, even run queries with phpMyAdmin.
# apt-get install phpmyadmin
You will be asked to choose the web server that you are running, since we are using apache2, select apache2.
At the next screen, we will be asked if we want to configure databse for phpmyadmin with dbconfig-common. Say yes on this
During phpmyadmin installation, you will be asked to type in your MySQL root’s password which you set it up earlier during MySQL server installation process. You will be asked for MySQL root’s password twice
After that you can use phpmyadmin via domain.com/phpmyadmin