
Ubuntu 14.04 LTS (Trusty Tahr) is available to download as of today 04/17/2014. If you are using older version Ubuntu 13.10, Ubuntu 12.04 LTS or even older Ubuntu version, and you want to upgrade to the newer Version of Ubuntu 14.04 LTS. I’m going to show you how to upgrade from older Ubuntu release to Ubuntu 14.04 LTS in this article.
If you want to download and do fresh install Ubuntu 14.04 LTS, you can visit: http://www.ubuntu.com/download
Back up your data
Always backup your data regularly. You should not wait until you upgrade your system to newer Ubuntu release to backup your important data. Backup your data to an external hard drive, SAN (Storage area network), NAS (Network Attached Storage), or even USB flash drive. I highly recommened you to backup your data often, and backup before you do any major system upgrade.
Apply updates of current Ubuntu version
To prevent system crash, or newer Ubuntu verion breaks your current Ubuntu settings, check and apply all the updates of your current Ubuntu Version before upgrade your current Ubuntu version to the newer version.
To check and update your current Ubuntu version
$ sudo apt-get update

$ sudo apt-get dist-upgrade -y
$ sudo su

# lsb_release -a
Linux 3.2.0-23-generic x86_64

root@phx:~# lsb_release -a

No LSB modules are available.

Distributor ID: Ubuntu

Description:    Ubuntu 12.04.4 LTS

Release:        12.04

Codename:       precise
Upgrade from Ubuntu 13.10
Ubuntu 13.10 Raring Ringtail is a non LTS (Long Term Support) version which End Of Life date is July 2104. If you have Ubuntu Desktop 13.10, you can do system upgrade the “Gui” way or the “Non-Geek” way.
Upgrade from Ubuntu Desktop 13.10
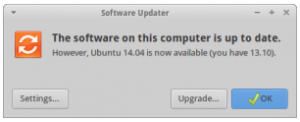
Boot up and login to your Ubuntu Desktop 13.10 system. On your keyboard, press “Alt+F2″, and type in “update-manager” without the quotes. On Update Manger window, click “Check” to check for new update. After the checking finished, you shoud see “New Ubuntu release ’14.04′ is available”, and “Upgrade” button next to the line. All you have to do now is to click on “Upgrade” button to upgrade your Ubuntu 13.10 to Ubuntu 14.04 LTS.
Upgrade from Ubuntu Server 13.10
Unlike Ubuntu Desktop version, Ubuntu Server does not come with GUI (Graphical user interface). You can only communicate with your system via the terminal (command line) only.
Install update-manager-core packge which manage and upgrade Ubuntu core.
$ sudo apt-get update

$ sudo apt-get install update-manger-core
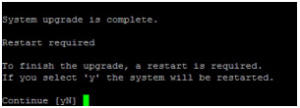
$ sudo do-release-upgrade
$ sudo reboot
Upgrade from Ubuntu Desktop and Ubuntu server 12.04 LTS or older versions
On Ubuntu 12.04 or older version, the upgrade steps is similar to upgrade from Ubuntu Server 13.10. On Ubuntu 12.04 Desktop, go the the launcher, and type in “terminal”. Click on “Terminal” application.
On the terminal, type in
$ sudo apt-get update

$ sudo apt-get install update-manager-core
In case you see “E: Unable to locate package update-manger-core” error when you install update-manager-core package, you might go ahead and skip to the next step.
With the normal do-release-upgrade command, you may get “No new release found.” error. What you need to do is to add -d option ( –devel-release), the -d option will check if upgrading to the latest devel release is possible.
$ sudo do-release-upgrade -d
You should see something similar to this
Checking for a new Ubuntu release

Get:1 Upgrade tool signature [198 B]

Get:2 Upgrade tool [1,148 kB]

Fetched 1,148 kB in 0s (0 B/s)

authenticate 'trusty.tar.gz' against 'trusty.tar.gz.gpg'

extracting 'trusty.tar.gz'


Checking package manager

Reading package lists... Done

Building dependency tree

Reading state information... Done

Building data structures... Done


Calculating the changes


Calculating the changes


Do you want to start the upgrade?


1 package is going to be removed. 100 new packages are going to be

installed. 350 packages are going to be upgraded.


You have to download a total of 176 M. This download will take about

6 minutes with your connection.


Installing the upgrade can take several hours. Once the download has

finished, the process cannot be canceled.


Continue [yN]  Details [d]
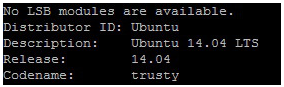
# lsb_release -a
$ sudo apt-get update

$ sudo apt-get install lsb-core
The following package was automatically installed and is no longer required:

  linux-headers-3.2.0-60

Use 'apt-get autoremove' to remove it.

The following extra packages will be installed:

  alien binutils build-essential cpp cpp-4.8 cups-bsd cups-client cups-common

  debhelper debugedit dh-apparmor dpkg-dev fakeroot g++ g++-4.8 gcc gcc-4.8

  gettext heirloom-mailx intltool-debian lib32z1 libalgorithm-diff-perl

  libalgorithm-diff-xs-perl libalgorithm-merge-perl libasan0 libasprintf-dev

  libatomic1 libavahi-client3 libavahi-common-data libavahi-common3

  libc-dev-bin libc6-dev libc6-i386 libcloog-isl4 libcroco3 libcups2

  libcupsfilters1 libcupsimage2 libdpkg-perl libfakeroot

  libfile-copy-recursive-perl libfile-fcntllock-perl libgcc-4.8-dev

  libgettextpo-dev libgettextpo0 libgomp1 libisl10 libitm1 libjbig0

  libjpeg-turbo8 libjpeg8 libldb1 liblua5.2-0 libmail-sendmail-perl libmpc3

  libmpfr4 libnspr4 libnss3 libnss3-nssdb libntdb1 libquadmath0 librpm3

  librpmbuild3 librpmio3 librpmsign1 libsmbclient libstdc++-4.8-dev

  libsys-hostname-long-perl libtalloc2 libtdb1 libtevent0 libtiff5 libtsan0

  libunistring0 libwbclient0 linux-libc-dev lsb-invalid-mta lsb-security m4

  make manpages-dev pax po-debconf python-ldb python-ntdb python-samba

  python-talloc python-tdb rpm rpm-common rpm2cpio samba-common

  samba-common-bin samba-libs smbclient update-inetd

Suggested packages:

  lsb-rpm lintian binutils-doc cpp-doc gcc-4.8-locales cups xpp dh-make

  rpm-i18n apparmor-easyprof debian-keyring g++-multilib g++-4.8-multilib

  gcc-4.8-doc libstdc++6-4.8-dbg gcc-multilib autoconf automake1.9 libtool

  flex bison gdb gcc-doc gcc-4.8-multilib libgcc1-dbg libgomp1-dbg libitm1-dbg

  libatomic1-dbg libasan0-dbg libtsan0-dbg libbacktrace1-dbg libquadmath0-dbg

  binutils-gold gettext-doc exim4 mail-transport-agent glibc-doc

  libstdc++-4.8-doc lsb make-doc libmail-box-perl elfutils heimdal-clients

  cifs-utils

The following NEW packages will be installed:

  alien binutils build-essential cpp cpp-4.8 cups-bsd cups-client cups-common

  debhelper debugedit dh-apparmor dpkg-dev fakeroot g++ g++-4.8 gcc gcc-4.8

  gettext heirloom-mailx intltool-debian lib32z1 libalgorithm-diff-perl

  libalgorithm-diff-xs-perl libalgorithm-merge-perl libasan0 libasprintf-dev

  libatomic1 libavahi-client3 libavahi-common-data libavahi-common3

  libc-dev-bin libc6-dev libc6-i386 libcloog-isl4 libcroco3 libcups2

  libcupsfilters1 libcupsimage2 libdpkg-perl libfakeroot

  libfile-copy-recursive-perl libfile-fcntllock-perl libgcc-4.8-dev

  libgettextpo-dev libgettextpo0 libgomp1 libisl10 libitm1 libjbig0

  libjpeg-turbo8 libjpeg8 libldb1 liblua5.2-0 libmail-sendmail-perl libmpc3

  libmpfr4 libnspr4 libnss3 libnss3-nssdb libntdb1 libquadmath0 librpm3

  librpmbuild3 librpmio3 librpmsign1 libsmbclient libstdc++-4.8-dev

  libsys-hostname-long-perl libtalloc2 libtdb1 libtevent0 libtiff5 libtsan0

  libunistring0 libwbclient0 linux-libc-dev lsb-core lsb-invalid-mta

  lsb-security m4 make manpages-dev pax po-debconf python-ldb python-ntdb

  python-samba python-talloc python-tdb rpm rpm-common rpm2cpio samba-common

  samba-common-bin samba-libs smbclient update-inetd

0 upgraded, 97 newly installed, 0 to remove and 0 not upgraded.

Need to get 42.5 MB of archives.

After this operation, 165 MB of additional disk space will be used.

Do you want to continue? [Y/n]
LSB Version:    core-2.0-amd64:core-2.0-noarch:core-3.0-amd64:core-3.0-noarch:core-3.1-amd64:core-3.1-noarch:core-3.2-amd64:core-3.2-noarch:core-4.0-amd64:core-4.0-noarch:core-4.1-amd64:core-4.1-noarch:security-4.0-amd64:security-4.0-noarch:security-4.1-amd64:security-4.1-noarch

Distributor ID: Ubuntu

Description:    Ubuntu 14.04 LTS

Release:        14.04

Codename:       trusty
# nano /etc/update-manager/release-upgrades
[DEFAULT]

Prompt=normal
[DEFAULT]

Prompt=lts
Now you can do-release-upgrade normally in the terminal
$ sudo update

$ sudo do-release-upgrade