How to install VNC Server on CentOS 6
I have been writing tutorials how to work with Linux server in the terminal. For any Linux Administrator, we don’t need a GUI (graphical user interface) to work efficiency in Linux, but sometimes it’s nice to have a GUI to web browser, view/edit documents, watch videos comfortably. If you have some/many idle VPS (virtual private server) or dedicated server, why not turn them into a remote Linux workstation with a VNC Server. Well, that’s why I’m going to show you How to install VNC Server on CentOS 6 in this tutorial.
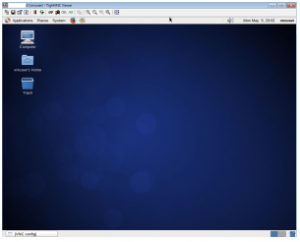
I’m going to install and configure TightVNC VNC Server, TightVNC is a free cross-platform remote control software which allow you to remotely control a remote machine with your local mouse and keyboard.
Install GUI to CentOS 6
If you simply want to remotely control a server, we can do that with SSH in the terminal without a GUI. We are doing a bit more fancy than normal SSH (interface), we are going to have GUI to work with now 🙂 yeah!
# yum -y update

# yum -y upgrade

# yum groupinstall "Desktop" -y
Note: There are more GUI options for you to choose in CentOS, you can visit how to install gui to centos minimal for more GUI in Centos
Install Firefox and nano on Centos
The groupinstall “Desktop” packages does not come with a web browser, if you want to browse the web via the remote VNC server, install firefox. Since I’m not a vi/vim fan, I use nano as Text Editor, you don’t have to install nano if use other text editor.
# yum -y install firefox nano
Install VNC Server/TightVNC on CentOS 6
The first step is to install VNC Server or TightVNC server on CentOS 6, which is pretty simple to to
# yum install tigervnc-server -y
ouput:
Installed:

  tigervnc-server.i686 0:1.1.0-8.el6_5
Configure VNC Server/TightVNC on CentOS 6
You should have VNC Server/TightVNC installed on the remote server, now we are going to configure TightVNC user/password/port to accept VNC connections.
You should not use root user to ssh or vnc, so we are going to create a separate user for vnc purpose. If you already have another user instead of root and you want to use that user for vnc connection, it’s fine too. For our tutorial I’m going to create a user named vncuser for vnc purpose.
# adduser vncuser
To set vnc password, you must switch to that specific user, and use vncpasswd command to set vnc’s password for that user. You will be asked to type in vnc’s password two times.
# su vncuser

# vncpasswd
# passwd vncuser
# nano /etc/sysconfig/vncservers
VNCSERVERS="2:vncuser"

VNCSERVERARGS[2]="-geometry 1024x768"
Now we are ready to start VNC Server
# service vncserver start
If you want your VNC Server starts after boot/reboot
# chkconfig vncserver on
Set nameserver on CentOS 6
Make sure you set the nameserver (DNS) or else your server can’t resolve names for you.
# echo nameserver 8.8.8.8 >> /etc/resolv.conf

# echo nameserver 8.8.4.4 >> /etc/resolv.conf

# echo nameserver 208.67.222.222 >> /etc/resolv.conf

# echo nameserver 208.67.220.220 >> /etc/resolv.conf
# iptables -L

# iptables -A INPUT -m state --state NEW -m tcp -p tcp -m multiport --dports 5901:5903,6001:6003 -j ACCEPT

# iptables-save