How to Use Photoshop’s Pen Tool
Pen Tool Tutorial Recommended for Beginner Level Photoshop Users
In this Photoshop tutorial we will explore how to use the pen tool.
First, we will look at the pen tool’s basic controls. We will examine creating paths, curvature modification and anchor point adjustments.
Next, on the flollowing page, we will use our new pen tool skills to cut out an image. This skill is so essential to know when using Adobe Photoshop, and it really illustrates the power behind the pen tool.
Finally we will see how a path created with the pen tool can be used to create custom shapes. Custom shapes are vectors so they will never pixelate or lose quality. Again this is such a handy skill, you’ll end up using it all the time!
BASIC CONTROLS OF THE PEN TOOL
Photoshop’s pen tool you have three options: Create a new work path, Create a new shape layer, and Fill Pixels.

We will use the Create a new work path option as this the most commonly used. You can find these options in the top left hand corner of the Photoshop window. See the image below.
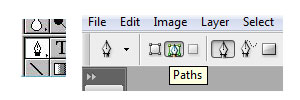
Just like selection tools, the pen tool has several different options for the resulting path. The most commonly used is “add to path area”. See image below.

Take your pen tool and click on a blank canvas similar to what I have done below. Each time you click you create an anchor point.
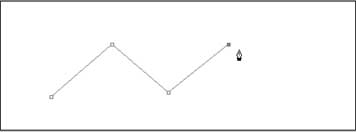
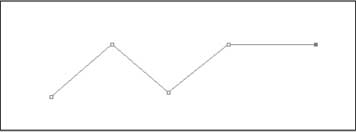
Hold down Shift, move the mouse and click again. Holding down shift while making an anchor point creates it in a straight line with the last anchor point.
We can add and delete anchor points on the path we have created. Right click on the pen tool on the toolbar to reveal further tools. Use the Add and Delete Anchor Point Tool to do just that!
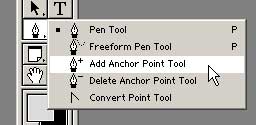
I used the Delete Anchor Point Tool to remove the forth anchor point.

Now, let’s look at the Convert Point Tool for curvature modification and moving anchor points.
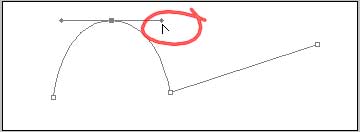
With the convert point tool click and drag on the second anchor point. Without letting go, move the mouse around and see how it affects the curve. The line that is created is called the Tangent Line. The tangent line controls the curvature of the curve.
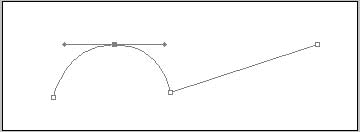
Holding down Ctrl click on the anchor point and move the mouse, see how this allows you to move the anchor point.

Click on one end of the tangent line and drag.
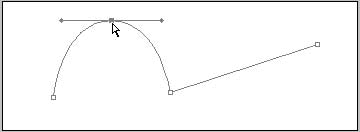
Click on one end of the tangent line and drag.

This breaks the tangent line in half and creates sharp path changes.
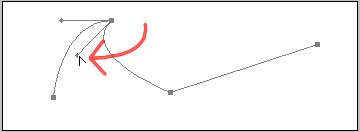
Move the entire path by selecting the Path Component Selection Tool from the toolbar and drag the path to a new location.

Delete your path by right clicking on the path and select Delete Path.
Finally I will briefly touch on another style of creating a path. With your pen tool create two anchor points however on the second click don’t let go, drag the click to create the tangent line. The tangent line will affect the next anchor point that you create. Try it out. I don’t use this technique because I find it slower but many do…use the technique that feels right for you.
So that’s the basics of Photoshop pen tool. Try the following exercises on the next page, cutting out an image and creating a custom shape, to practice your use of the pen tool.
CUTTING OUT AN IMAGE WITH THE PEN TOOL
You might already be cutting out images in Photoshop but if you’re not using the pen tool, then you are probably doing it wrong! “Why?”, you may ask.
1. Accuracy. There is no way you are going to get the same level of control using the lasso tool or other selection methods. Using the pen tool enables you select partial pixels. This means that the edges of your selection will always be smooth (no jagged pixel edges). The pen tool literally puts transparency on the bit of the pixel that exists outside of the selection.
2. Options. By using the pen tool there are numerous post options available. You can save the shape, or maybe fill or stroke it.
So open your image in Photoshop and using your pen tool trace around the outside. There are two ways to do this. You could click and drag on each anchor point to get the right curves but I find this process too slow. I prefer to click around the object (essentially cutting it out with straight lines) and then go back and adjust the curves/anchor points.
Make sure your pen tool is set to Create Path and that the path option is “add to path area”. See image below.

I’ve chosen a picture of Gary Hoff, doing a standard orangutan impersonation, as the image I want to cut out. The image below shows the rough work path I lay down first. If the image you are cutting is quite detailed, like mine, zoom in (Ctrl +) and out (Ctrl – ) as you work.

It is EXTREMELY important to close the work path so that it can be made into a selection. This means that your last anchor point must meet up to the first anchor point. Once you have made your way around the object you must click once more on the starting point. When you get to the starting anchor point it will be marked with a small circle. See image below.

The image below shows a close up of the work path once the curves were created and the anchor points adjusted.
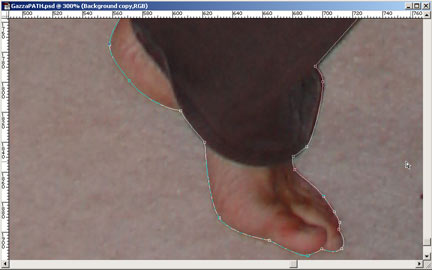
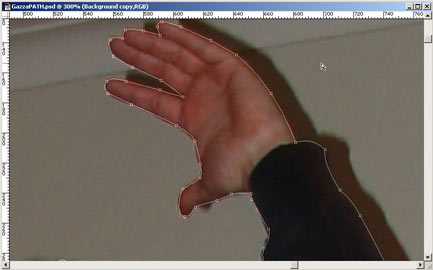
The trick is to know where to put anchor points, and this is something that comes with a little practice. The pen tool does become very easy, but initially it will be slow, so try not to get put off.
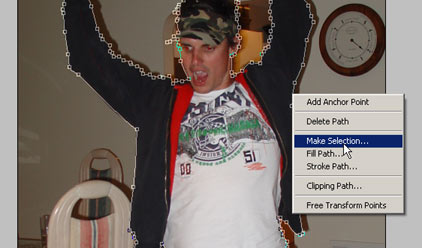
Now right click on the work path and select Make Selection.
Copy the selection (Ctrl + c) and paste it on to another image (Ctrl + v). I’ve chosen a nice jungle path for Gary.

Due to the partial pixel selection the image blends smoothly on the new background. With only a few more minor adjustments this will be a nice composite.
CREATING COMPLEX SHAPES
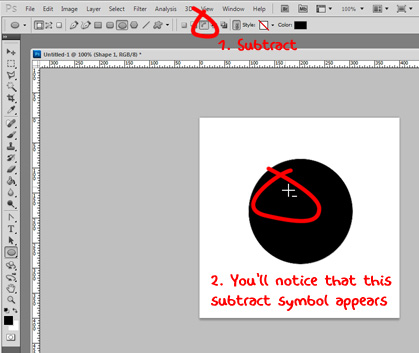
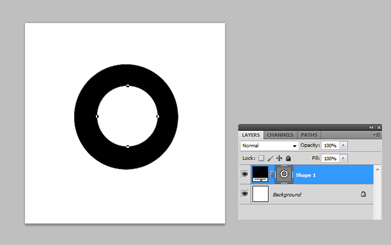
To create a shape within a shape, such as a donut, it is a simple matter of making sure your path is active and selecting the right option from the top (for a donut it would be “subtract from shape area”). The images below explain it better than text.
1. Create a circle Shape Layer using your Elipse Tool. See image below…
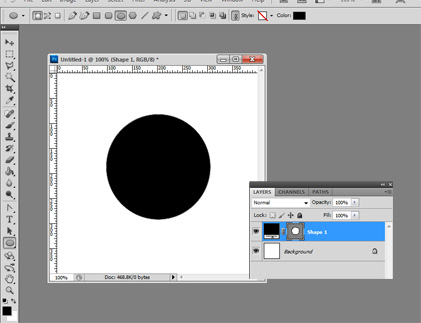
2. Select “subtract from” on the top options (see 1. below) and notice how the cursor shows a subtract symbol when you mouse-over the shape (see 2. below).
3. The result is a donut.
4. Use your Path Selection Tool to move the paths and alter the donut shape.
This same technique also works with paths. The important part is to remember that the first path must be active before you create the second path.
CREATING CUSTOM SHAPES
If we go to Paths Palette you will see our path is still there. Click once on the path layer to reveal our work path again.
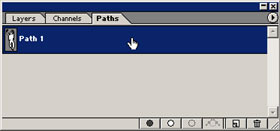
Now with Edit >> Define Custom Shape…

Name your shape and click OK. Select your Custom Shape Tool from the Toolbar.
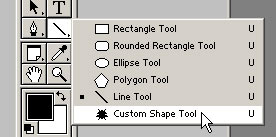
You will now see your new shape in the Custom Shape picker.
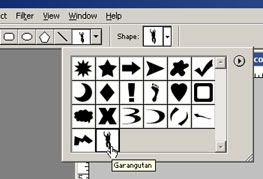
Now check your foreground colour before you make the shape. You can see in the image below my foreground color is black. The shape you create will be the foreground color.

Until now we have been making WORK PATHS but now we want to make a SHAPE. See image below.

Click and drag on your canvas to create your shape.
Hold down Shft while you drag, to re-create the shape with the same proportions (it won’t distort).
Now if you select Shape Layers and then create the shape you will see it creates a vector shape. Creating vector shapes is best.
Because the shape is a vector you can scale it up and down and it will never pixelate! (To apply effects to the layer you will need to rasterize the layer…simply right click on the layer and choose rasterize from the options).
If you create the shape using Fill Pixel (see image below) you must make sure the anti-alias box is checked.


Feel free to contact me via my contact page if you have any questions.
Thanks for shgrnia. What a pleasure to read!